


step by step ;
- Click Start, Settings, Control Panel.
- Double-click "Printers & Faxes"
- Double-click "Add Printer" to start the Add Printer Wizard
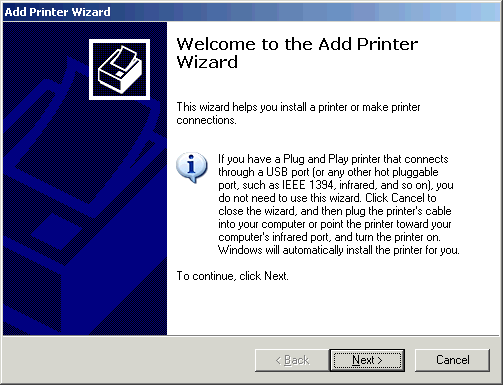
The Add Printer Wizard Welcome screen
- Click Next
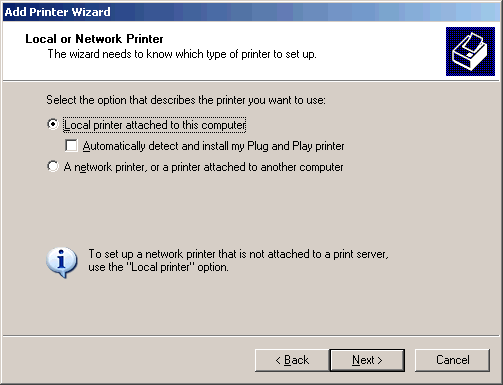
Local or Network Printer
- Click "Local Printer"
- Make sure there's NO checkmark next to "Automatically detect and install ..."
- Click Next
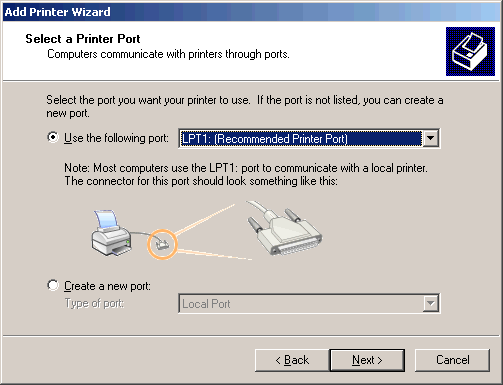
Select a Printer Port
- If your printer is actually attached to the computer, click "Use the following port" and select the port your printer's attached to.
- If you're installing a driver only to keep PowerPoint happy, choose LPT1: or FILE: (it doesn't really matter, since you'll never actually print to the port)
- If you're installing a local driver but need to print to a network printer, look for the printer's port on the network and choose it, if available. If not, choose LPT1: for now. You can change the setting later.
- Click Next
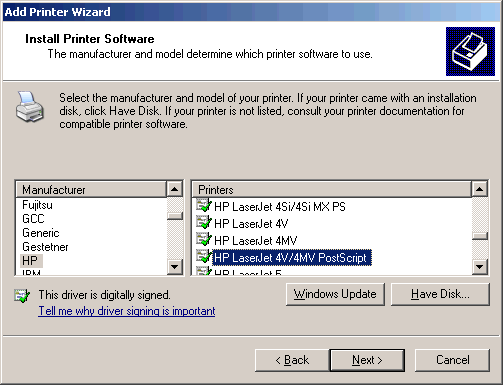
Install Printer Software
- If installing a real printer, select your printer manufacturer and printer model here.
- If you have an installation disk or CD that came with the printer, click "Have Disk" and locate the INF file for the printer (check the printer's documentation for specific instructions).
- If installing a printer only to keep PowerPoint happy, choose the HP LaserJet 4V/4MV as we've done here
- Click Next
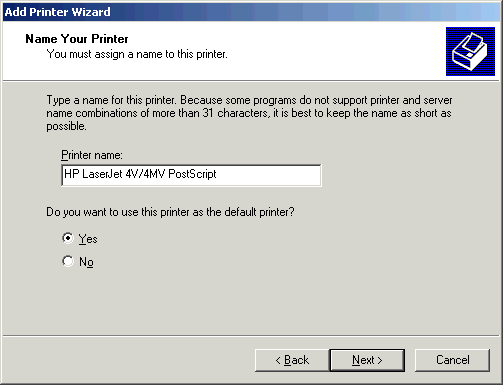
Name Your Printer
- Give the printer a name (this is the name you'll use to select it later)
- If installing a printer just to make PowerPoint happy, you might want to give it a name that indicates it isn't a real physical printer (PPT Pacifier, or the like)
- Click "Yes" under "Do you want to use this printer as the default printer" (this option may not appear in all Windows versions; see Notes below)
- Click Next
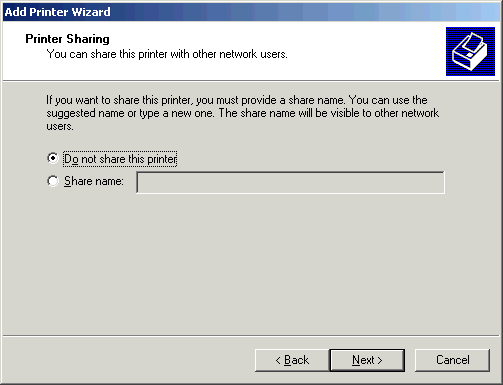
Printer Sharing
- Click "Do not share this printer"
- Click Next
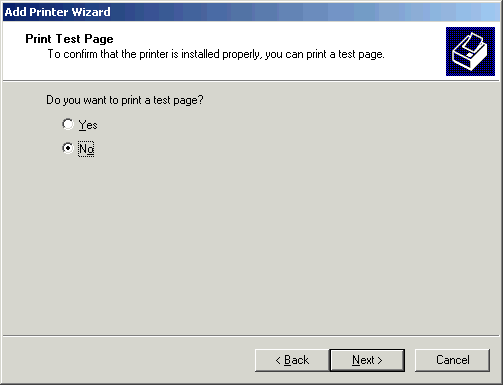
Print Test Page
- Click No
- Click Next
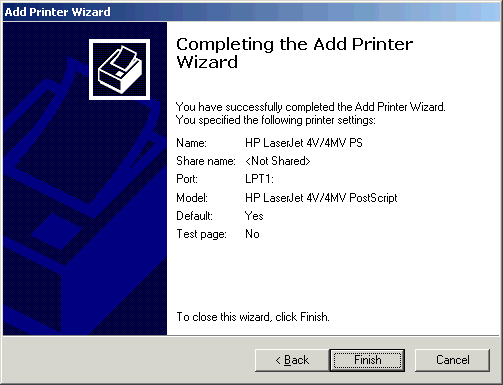
Completing the Add Printer Wizard
- Review your choices. Click Back if you need to change anything
- Click Finish
If you don't see "Use this printer as the default printer" in the "Name printer" screen, finish installing the printer, then click Start, Settings, Printers; rightclick the printer you just installed and click "Set as default printer" from the pop-up menu that appears.
If you have a physical printer installed, you can print a test page to make sure it's working correctly and to verify that it's a local and not a network-installed driver.
- Click Start, then click Printers and Faxes
- Right-click the printer you want to test and choose Properties from the pop-up menu
- Click "Print test page" on the Properties dialog box that appears
- When the test page finishes printing, check the following items on it:
- Computer name: this will be the name of the computer the printer driver is on. It should be the same as your computer's name. If it's some other computer's name, then the printer driver is NOT locally installed.
- Printer name: this should show the name you assigned when installing the driver; if it shows something like \\Computername\Printername, the driver's on the network, not on your PC. Consider removing the network version and installing a local driver instead.
untuk memperoleh drivernya silahkan kunjungi di sini

0 komentar:
Posting Komentar
terima kasih, DataNg keMbaLi ya!!